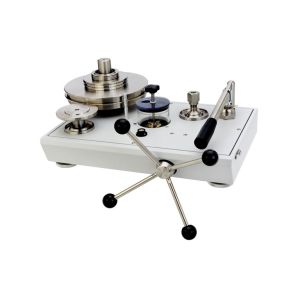
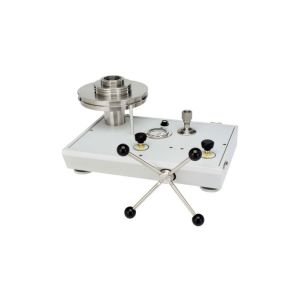
Fluke Calibration 9171 Field Metrology Well
Fluke Calibration 9171 Field Metrology WellFluke Calibration 9171 Field Metrology WellProduct overview: Fluke Calibration 9171 Field Metrology Well Accurate enough for lab use, and rugged and portable enough to take anywhere Best-performing industrial heat sources (accuracy, stability, uniformity) in the world Immersion depth to 203 mm (8 in) Optional ITS-90...
Fluke Calibration 9171 Field Metrology Well
Fluke Calibration 9171 Field Metrology Well
Product overview: Fluke Calibration 9171 Field Metrology Well
Accurate enough for lab use, and rugged and portable enough to take anywhere
- Best-performing industrial heat sources (accuracy, stability, uniformity) in the world
- Immersion depth to 203 mm (8 in)
- Optional ITS-90 reference input reads PRTs to ±0.006 °C
- Temperature range from –45 °C to 700 °C
Every once in a while, a new product comes around that changes the rules. It happened when we introduced handheld dry-wells. It happened when we introduced Micro-Baths. Now we’ve combined bath-level performance with dry-well functionality and legitimate reference thermometry to create Metrology Wells.
With groundbreaking new proprietary electronics from Fluke Calibration's (patents pending), Metrology Wells let you bring lab-quality performance into whatever field environment you might work in. New analog and digital control techniques provide stability as good as ±0.005 °C. And with dual-zone control, axial (or “vertical”) uniformity is as good as ±0.02 °C over a 60 mm (2.36 in) zone. (That’s 60 mm!) Such performance doesn’t exist anywhere else outside of fluid baths.
In short, there are six critical components of performance in an industrial heat source (which the European metrology community explains, for example, in the document EA-10/13): calibrated display accuracy, stability, axial (vertical) uniformity, radial (well-to-well) uniformity, impact from loading, and hysteresis. We added a seventh in the form of a legitimate reference thermometer input and created an entirely new product category: Metrology Wells.
(By the way, Metrology Wells are the only products on the market supported by published specifications addressing every performance category in the EA-10/13. Our specs aren’t just hopes or guidelines. They apply to every Metrology Well we sell.)
Specifications: Fluke Calibration 9171 Field Metrology Well
| Specifications | ||
| Range (at 23°C ambient) | –30°C to 155°C (–22°F to 311°F) | |
| Display accuracy | ±0.1°C full range | |
| Stability | ±0.005°C full range | |
| Axial uniformity | ±0.025°C at –30°C ±0.02°C at 0°C ±0.07°C at 155°C |
|
| Radial uniformity | ±0.01°C full range | |
| Loading effect (with a 6.35 mm reference probe and three 6.35 mm probes) | ±0.005°C at –30°C ±0.005°C at 0°C ±0.01°C at 155°C |
|
| Hysteresis | 0.025°C | |
| Well depth | 203 mm (8 in) | |
| Resolution | 0.001°C | |
| Display | LCD, °C or °F, user-selectable | |
| Key pad | Ten key with decimal and ± button. Function keys, menu key, and °C / °F key. | |
| Cooling time | 30 min: 23°C to –30°C 25 min: 155°C to 23°C |
|
| Heating time | 44 min: 23°C to 155°C 56 min: –30°C to 155°C |
|
| Size (H x W x D) | 366 x 203 x 323 mm (14.4 x 8 x 12.7 in) | |
| Weight | 15 kg (33 lb) | |
| Power | 115 V AC (±10%), or 230 V AC (±10%), 50/60 Hz, 550 W |
|
| Computer interface | RS-232 included | |
| Traceable calibration (NIST) | Data at –30°C, 0°C, 50°C, 100°C, and 155°C | |
| Specifications | Built-in Reference Input | |
| Temperature range | –200°C to 962°C (–328°F to 1764°F) | |
| Resistance range | 0 Ω to 400 Ω, auto-ranging | |
| Characterizations | ITS-90 subranges 4, 6, 7, 8, 9, 10, and 11 Callendar-Van Dusen (CVD): R0, a, b, d | |
| Resistance accuracy | 0 Ω to 20 Ω: 0.0005 W 20 Ω to 400 Ω: 25 ppm |
|
| Temperature accuracy (does not include probe uncertainty) |
10 Ω PRTs: ±0.013°C at 0°C ±0.014°C at 155°C ±0.019°C at 425°C ±0.028°C at 700°C |
25 Ω and 100 Ω PRTs: ±0.005°C at –100°C ±0.007°C at 0°C ±0.011°C at 155°C ±0.013°C at 225°C ±0.019°C at 425°C ±0.027°C at 661°C |
| Resistance resolution | 0 Ω to 20 Ω: 0.0001 Ω 20 Ω to 400 Ω: 0.001 Ω |
|
| Measurement period | 1 second | |
| Probe connection | 4-wire with shield, 5-pin DIN connector | |
| Calibration | NVLAP accredited (built-in reference input only), NIST-traceable calibration provided | |
You can use this tab for adding shipping details, return policies and information or measurements etc.


